Update (Oct 24, 2025)
Due to some issues with versions
11.0.13and above, I’ve since pinned myseafile-mcimage at tag11.0.12
Preamble
I ditched Nextcloud in favour of Seafile. I regret not doing so sooner. In less than an hour, Seafile was running smoothly, quickly generating image previews and loading full images. The setup was simpler than with Nextcloud too. In this post, I’ll demonstrate how to get Seafile up and running in minutes using Podman and Cockpit.
If you read part 4, this setup process will be very familiar.
Setup
TL;DR: Adapt Seafile’s docker-compose.yml into a rootless setup using a pod.
Step 1: Acquire the necessary images
Seafile needs at least 3 containers:
- MariaDB
- Memcached
- Seafile itself
Seafile’s docker-compose.yml (linked above) uses specific versions of MariaDB and Memcached, but this file is slightly dated so I upgraded to the latest minor or patched version of each, as shown below:
podman pull docker.io/library/mariadb:10.6
podman pull docker.io/library/memcached:1.6.32
podman pull docker.io/seafileltd/seafile:11.0-latest
To pull the images via Cockpit’s UI, follow the same steps given in part 4.
Step 2: Create the necessary volumes
Seafile only requires 2 mounts:
/shared: Data (where the file chunks are stored)/var/lib/mysql: Database (where the file indexing information is stored)
As before, I’m storing my data as a bind mount on a 2 TB SSD and the database as a volume. The volume is created like so:
podman volume create seafile-dbCockpit doesn’t reference volume names directly, and instead requires the location of the volume on disk. This should be /home/$USER/.local/share/containers/storage/volumes/seafile-db.
Step 3: Create a pod
Since all three container communicate with each other, they must be in the same pod. Moreover, port mappings for the containers must be specified now rather than when the containers themselves are created. Volumes can be defined later on a per-container basis, however.
The pod can be created in Cockpit like so:
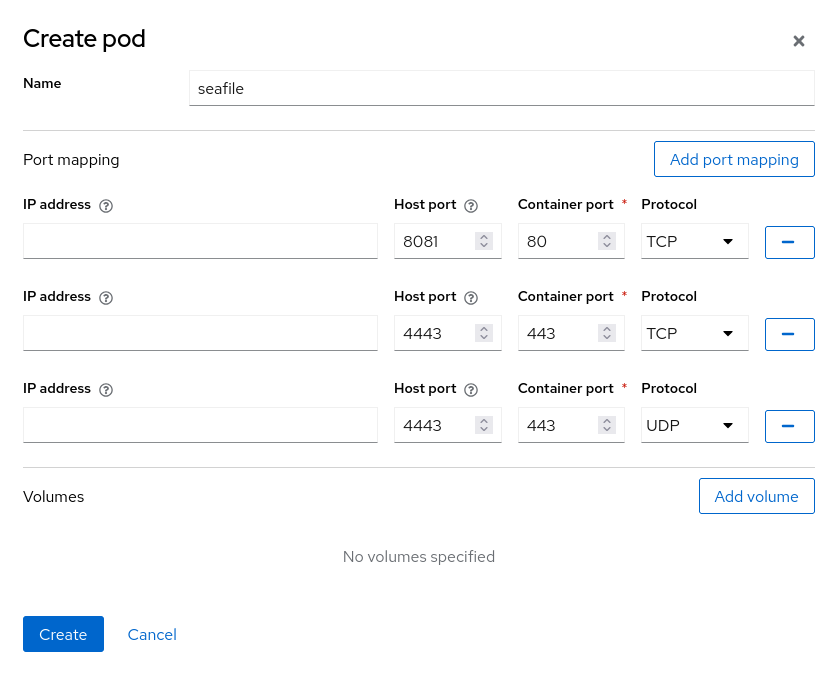
Breakdown
- The pod is named
seafile - Ports
4443and8081on the host are mapped to443and80in the container, respectively
Note
The following containers should be created in the order given
Step 4: Create the MariaDB container
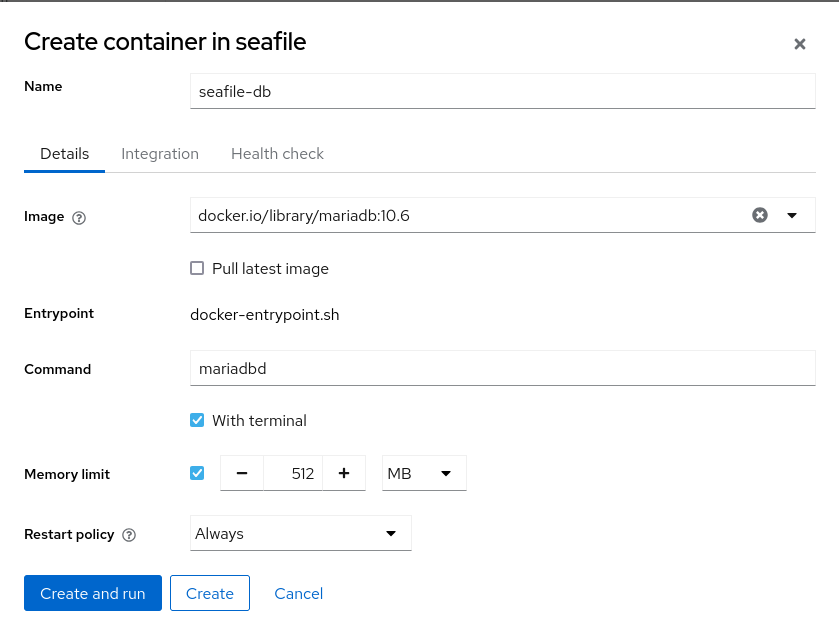
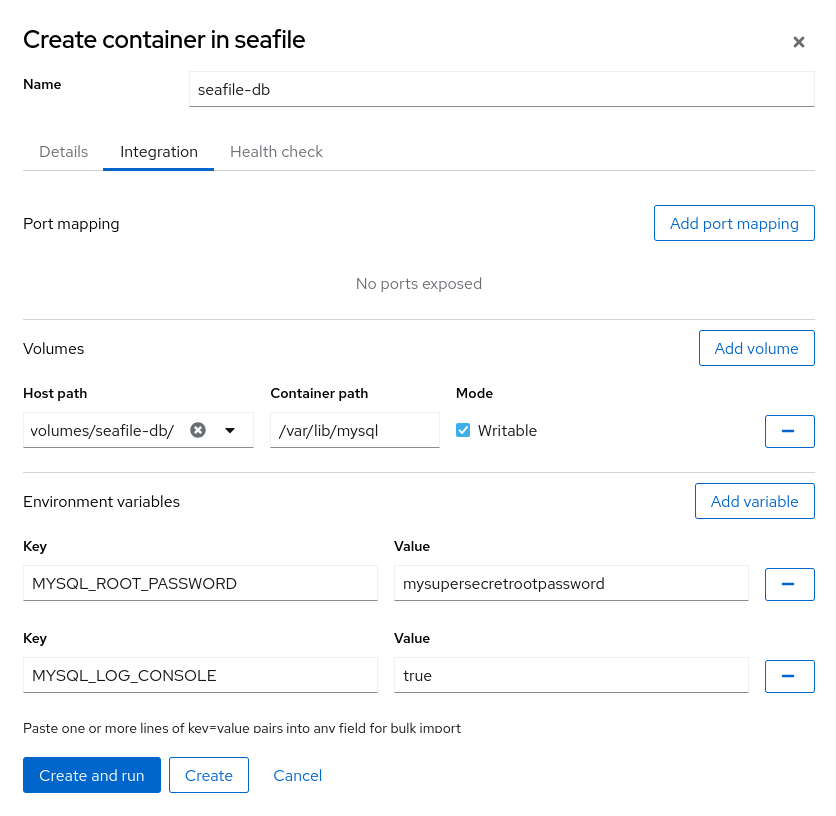
Breakdown
- The container is named
seafile-db - A memory limit of 512 MB is applied to the container
- The restart policy is set to “Always” so the container always restarts, should it stop unexpectedly
- The
seafile-dbvolume is bound to/var/lib/mysqlin the container - The following environment variables are passed-in:
MYSQL_ROOT_PASSWORD: The root password for the databaseMYSQL_LOG_CONSOLE: Redirects error logs tostderr, so that the error log goes into the container’s log1
Note
Remember
MYSQL_ROOT_PASSWORD, it will be used in step 6
Step 5: Create the Memcached container

Breakdown
- The container is named
seafile-cache - A memory limit of 256 MB is applied to the container
- The restart policy is set to “Always” so the container always restarts, should it stop unexpectedly
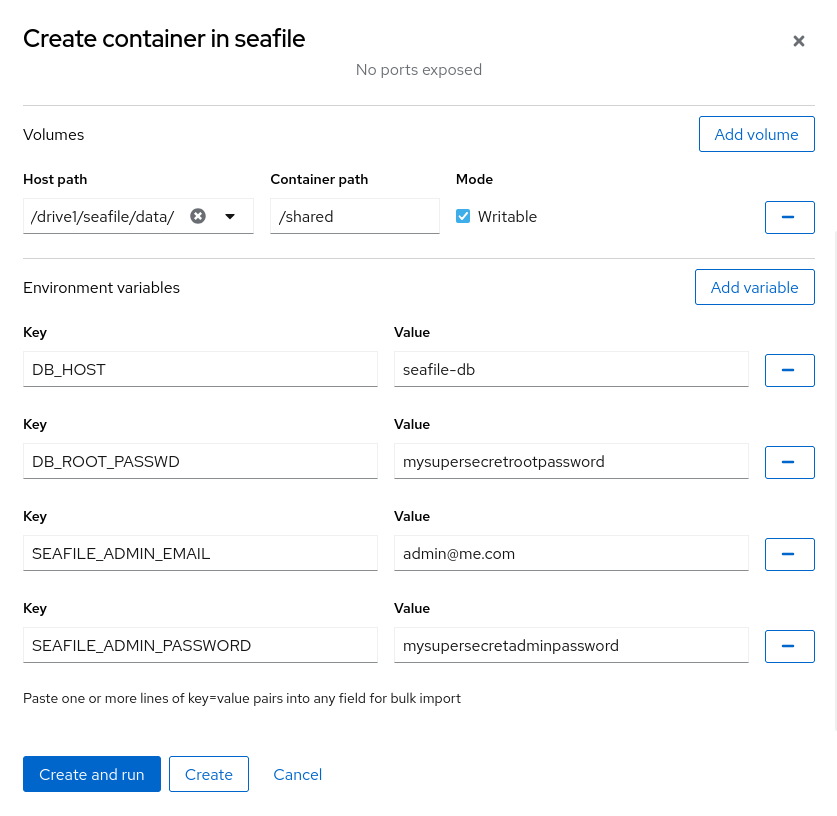
Step 6: Create the Seafile container
I learned to RTFM this time around, and found the system requirements for the community version and professional version, which define the minimum amount of memory to be 2GB. So let’s go with that.
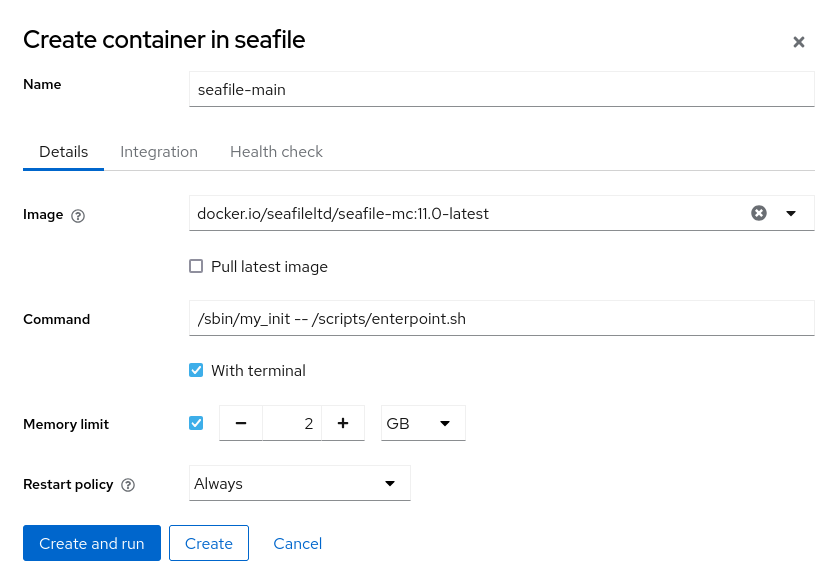
Breakdown
- The container is named
seafile-main - A memory limit of 2 GB is applied to the container
- The restart policy is set to “Always” so the container always restarts, should it stop unexpectedly
- The local volume on my 2 TB SSD is bound to
/sharedin the container - The following environment variables are passed-in:
DB_HOST: The hostname of the database, which can be resolved by the database container’s name,seafile-dbDB_ROOT_PASSWD: The root password for the databaseSEAFILE_ADMIN_EMAIL: Email to assign the initial admin userSEAFILE_ADMIN_PASSWORD: Password to assign the initial admin user
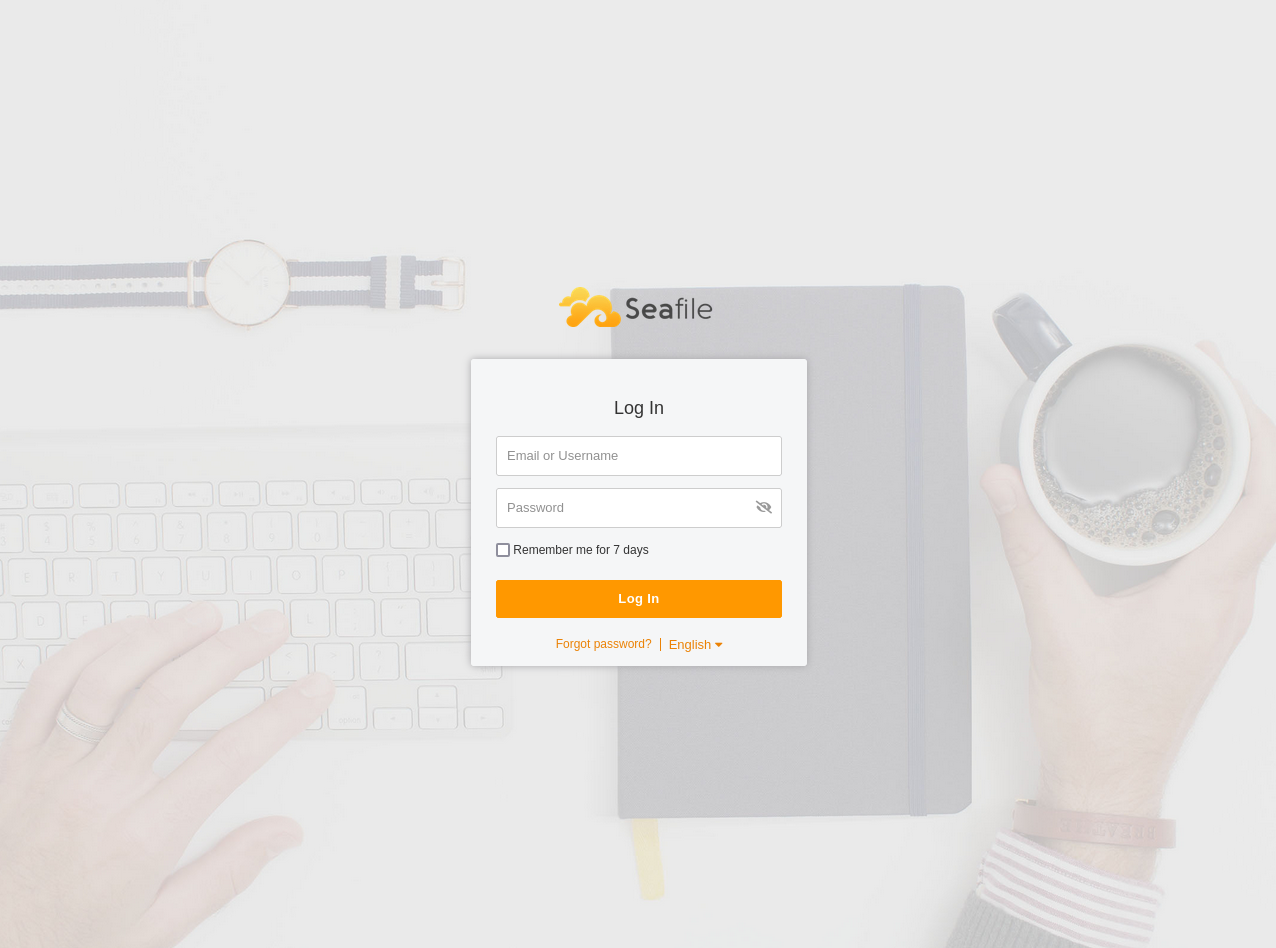
Step 7: Open the Seafile UI
Navigate to <hostname>:<port> (where hostname is your IP or hostname, and port is the port bound to 80 in seafile-main) to open Seafile. Use the admin credentials from step 6 to login.
Step 8: System Admin
After signing in, navigate to the system admin page by clicking on the avatar in the top right corner and then “System Admin” from the drop-down. From here, select the “Settings” tab. Or just go there directly via <hostname>:<port>/sys/web-settings. It should look something like this:
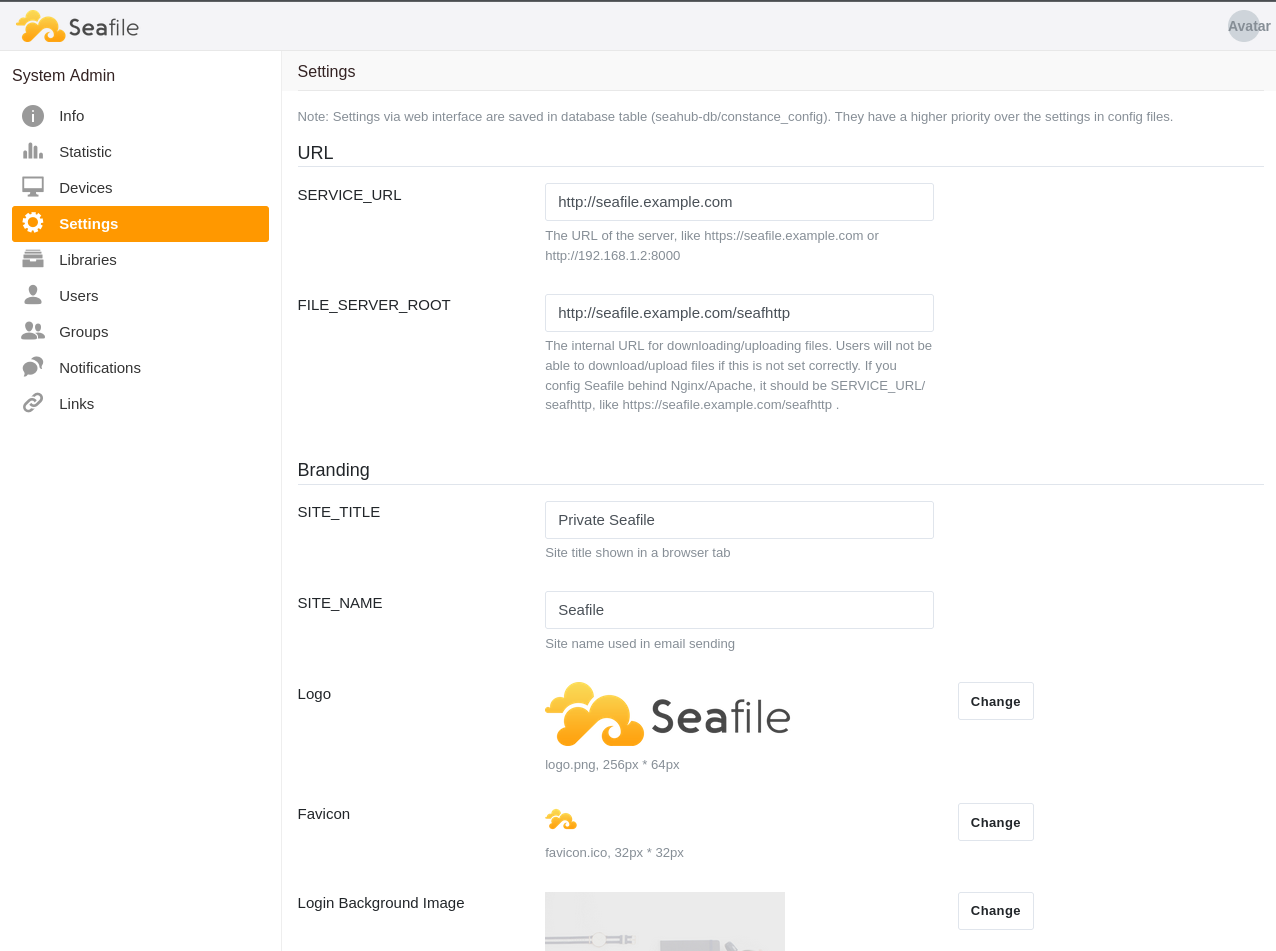
SERVICE_URL and FILE_SERVER_ROOT should be updated to wherever Seafile is located. For example, SERVICE_URL = http://<hostname>:<port> and FILE_SERVER_ROOT = http://<hostname>:<port>/seafhttp.
Step 9: Using Seafile
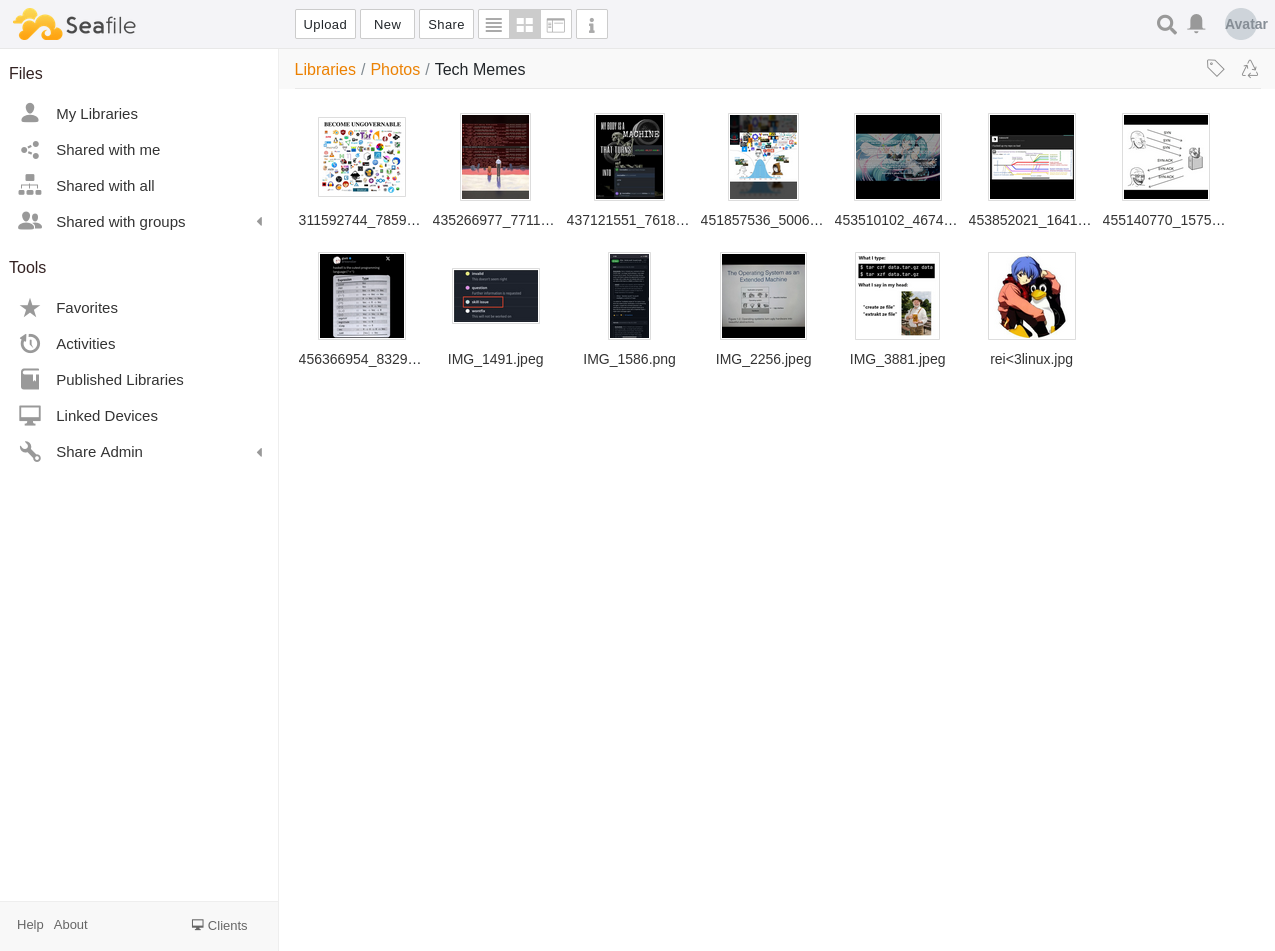
As before, I uploaded my silly little images as a test:
Then, I uploaded my entire Google Takeout archive once again. The difference in upload and preview rendering speed between Seafile and Nextcloud is staggering.
Summary
In this post, I discussed how to setup Seafile using MariaDB and Memcached as user containers in Cockpit using Podman.