Over the past week, I’ve gutted and replaced my homelab; hardware, software, and all. Today, I’m here to talk about why and how the rebuild came about.
Why
Despite the setup just working, I wasn’t satisfied. For one, it was ugly and cumbersome (both in physical appearance and in software configuration). For another, it was limiting (no room/power for more drives). Ultimately, it was not what I wanted, but what I had (note that there’s nothing wrong with that, I just happened to be fortunate enough to acquire what I wanted for a relatively low price; more on that in a moment).
Perhaps I spend too much time online, but I have been fascinated by minilabs - micro PCs, networking equipment, etc. stuffed into 10” (or smaller!) racks - for some time now; they’re cute and inconspicuous, unlike full-sized racks, and seem more attainable and maintainable, to boot. My discovery of this community was what prompted me to start my homelab journey in the first place. So basically, I wanted to go smaller; that is, from small form factor to micro form factor. I came across a great deal on a Dell OptiPlex 3050 Micro (i5-7500T, 16GB DDR4 RAM) and jumped on it.
Around the same time, Santa also brought me some 10” rack components I asked for. Combined with other components I scavenged from the old setup and the garage, I had everything I needed to start (mostly) fresh. And start fresh I did. Using this opportunity, I wanted to rethink how I managed my services and configurations, specifically to make future redeployments as seamless as possible.
What
Before moving on to the build itself, I thought it may be helpful to others if I detailed precisely which parts I used (as these details are often missing from similar showcases).
- 1x IKEA EKET cabinet
- 2x 12.5” H x 1” D square wooden dowel
- 1x Gator Cases 6U rack rails
- 12x 0.75” M8 wood screws
- 72x M8 washers (a hack to fill the gap between the dowels and rails)
- 1x GeeekPi 0.5U 10” CAT6 patch panel
- 2x GeeekPi 1U 10” rack shelf
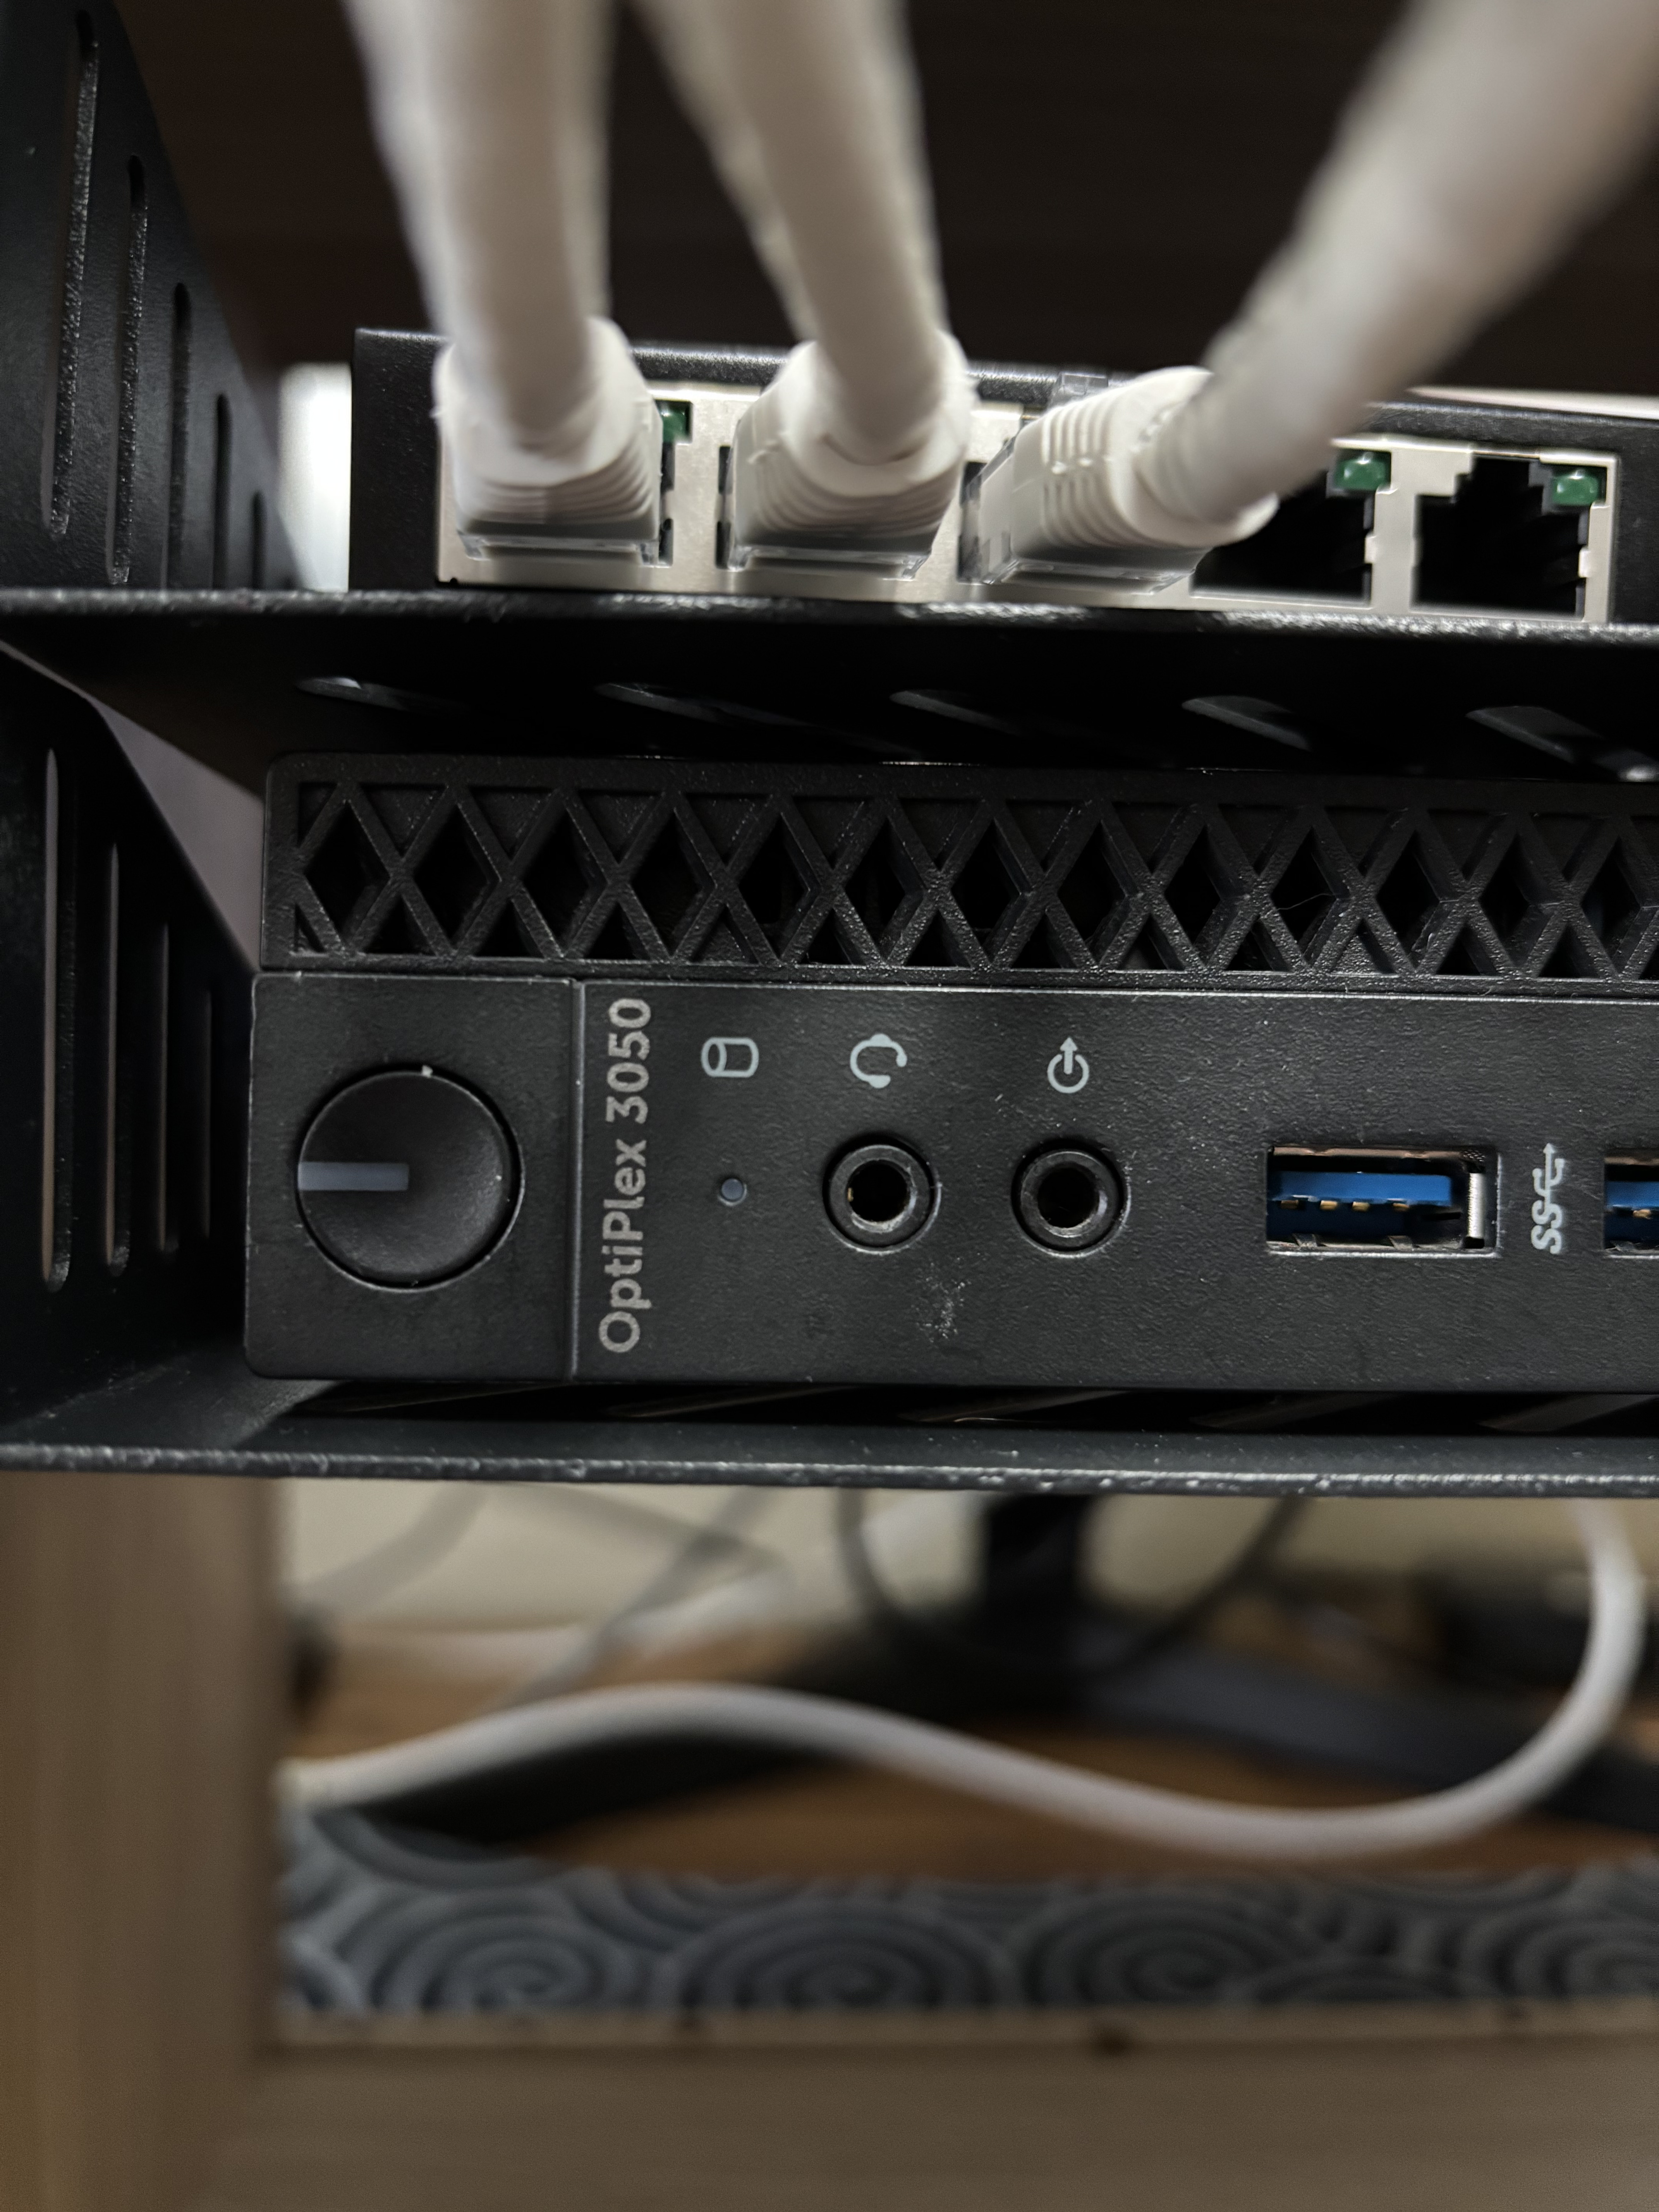
- 1x D-Link DGS-105
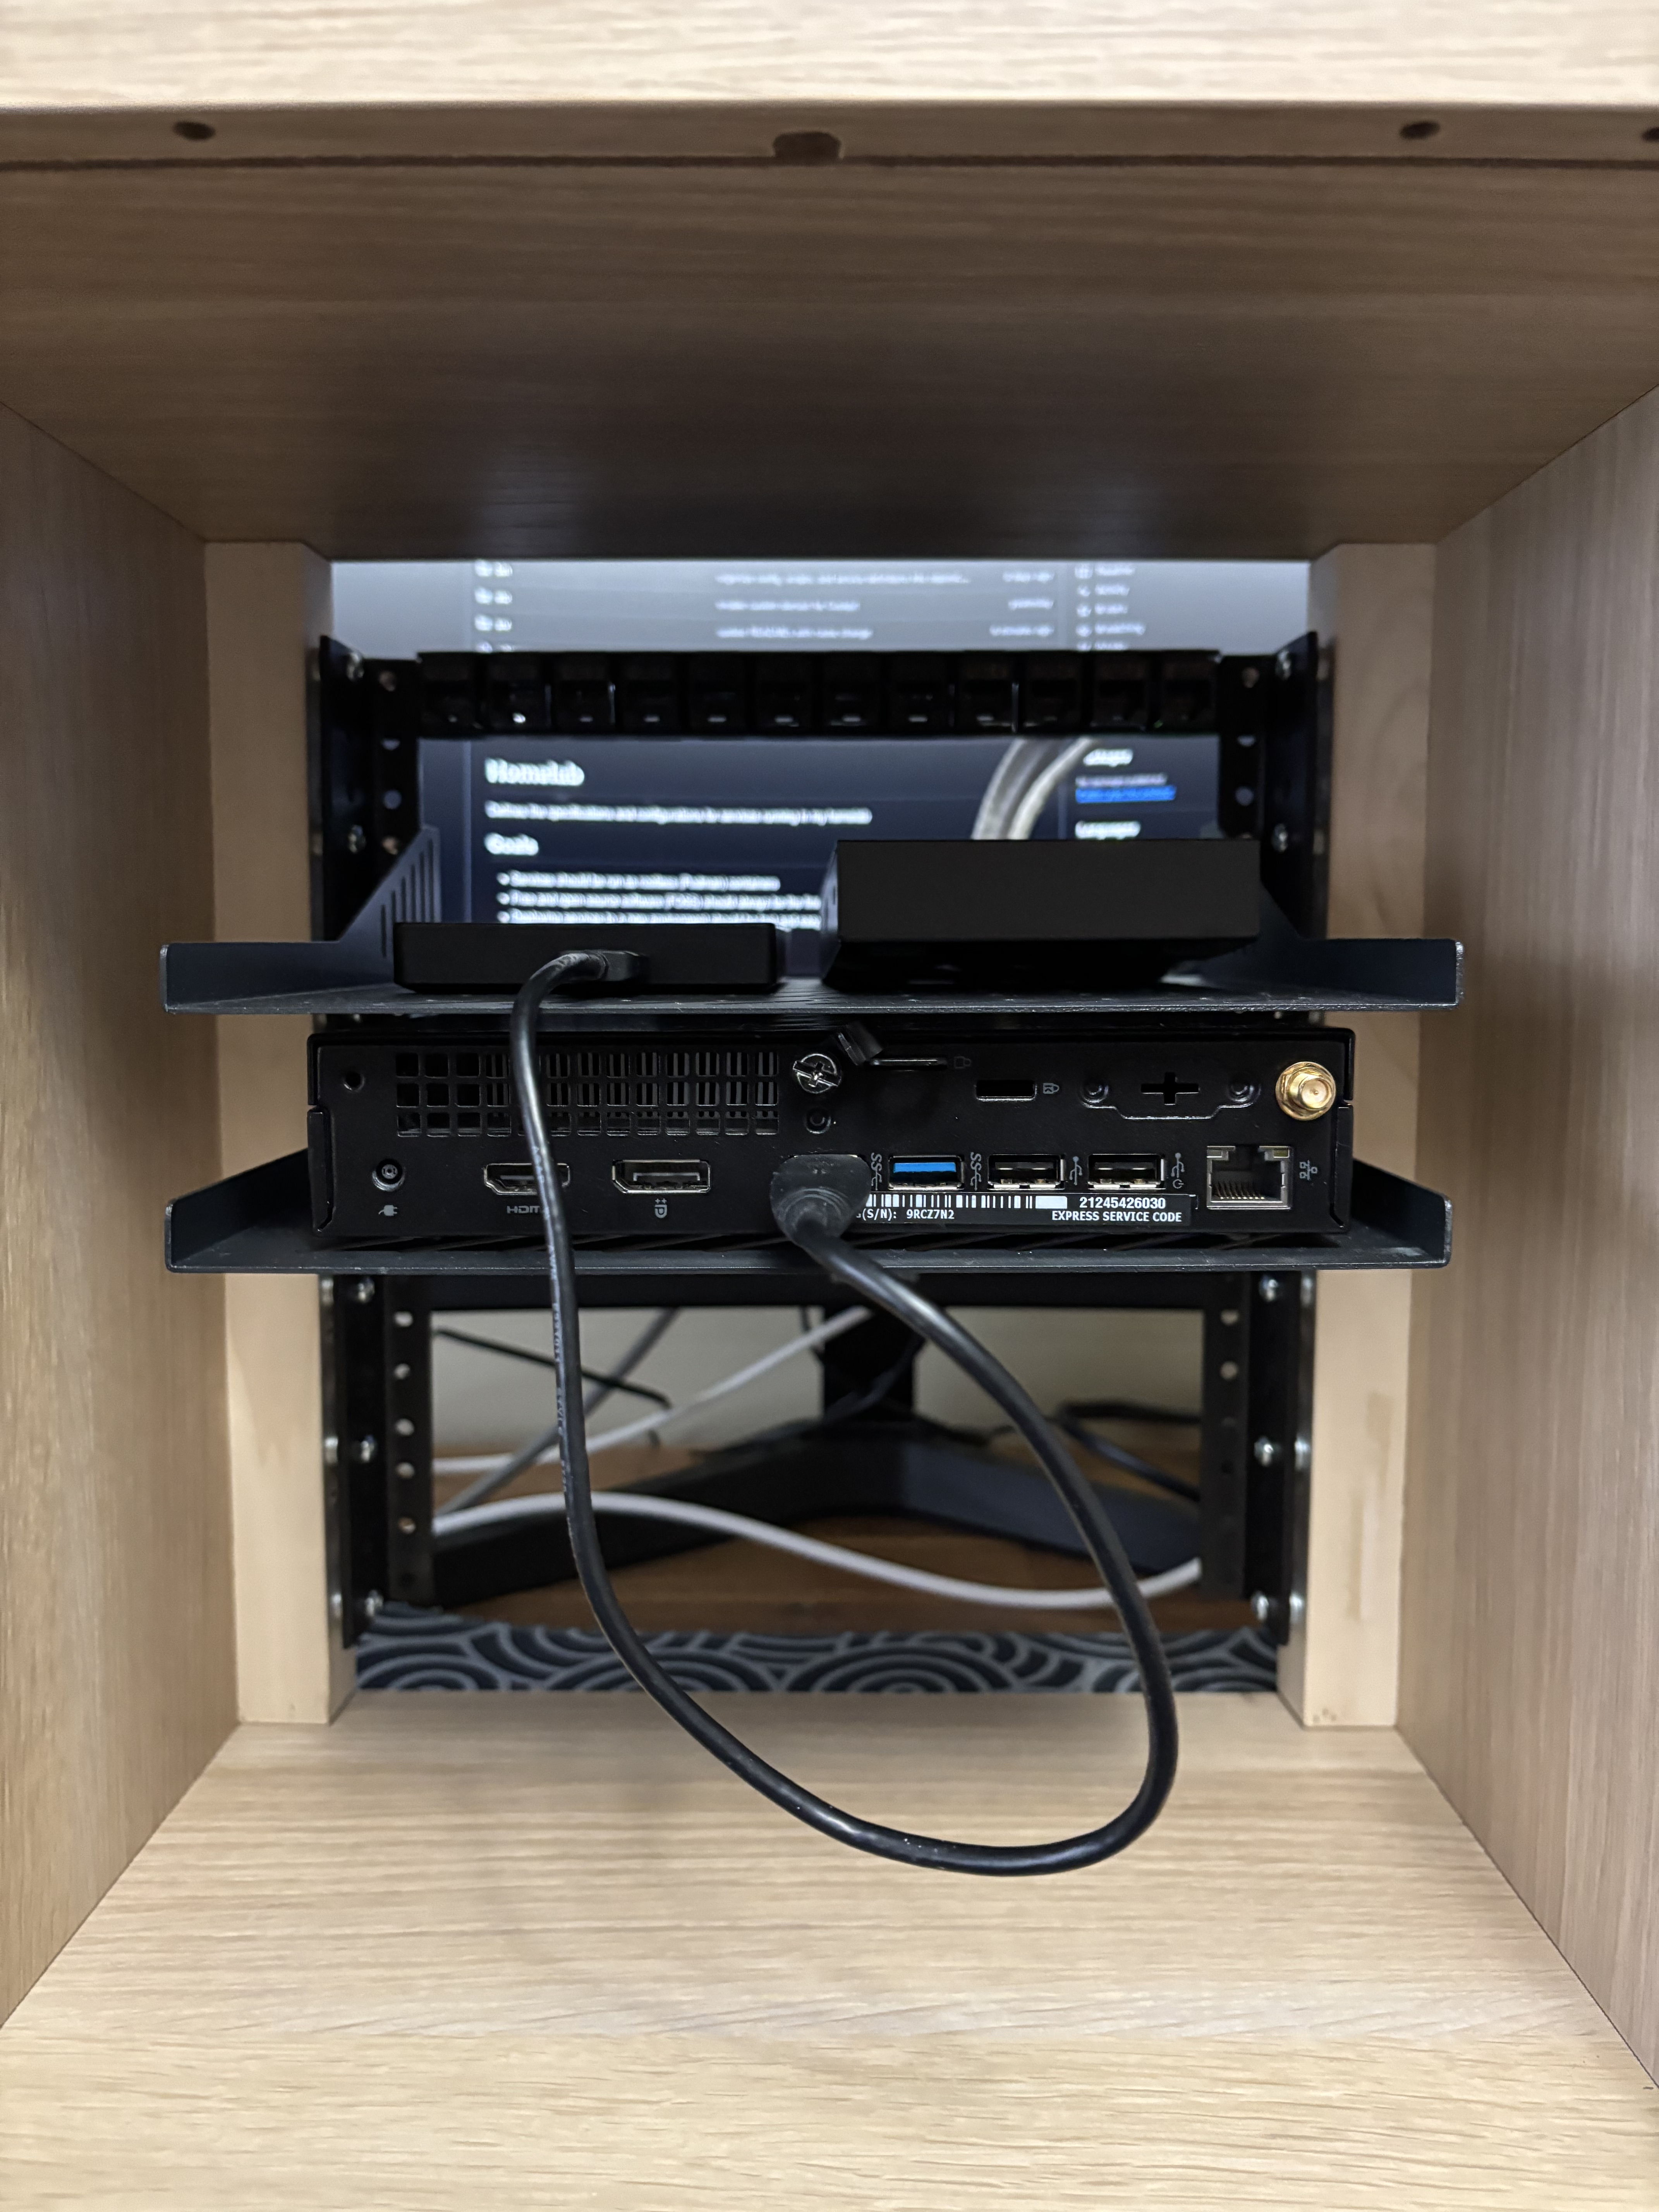
- 1x Dell OptiPlex 3050 Micro
- 1x Seagate 1.5TB USB HDD
- 3x 6” CAT6 patch cables
How
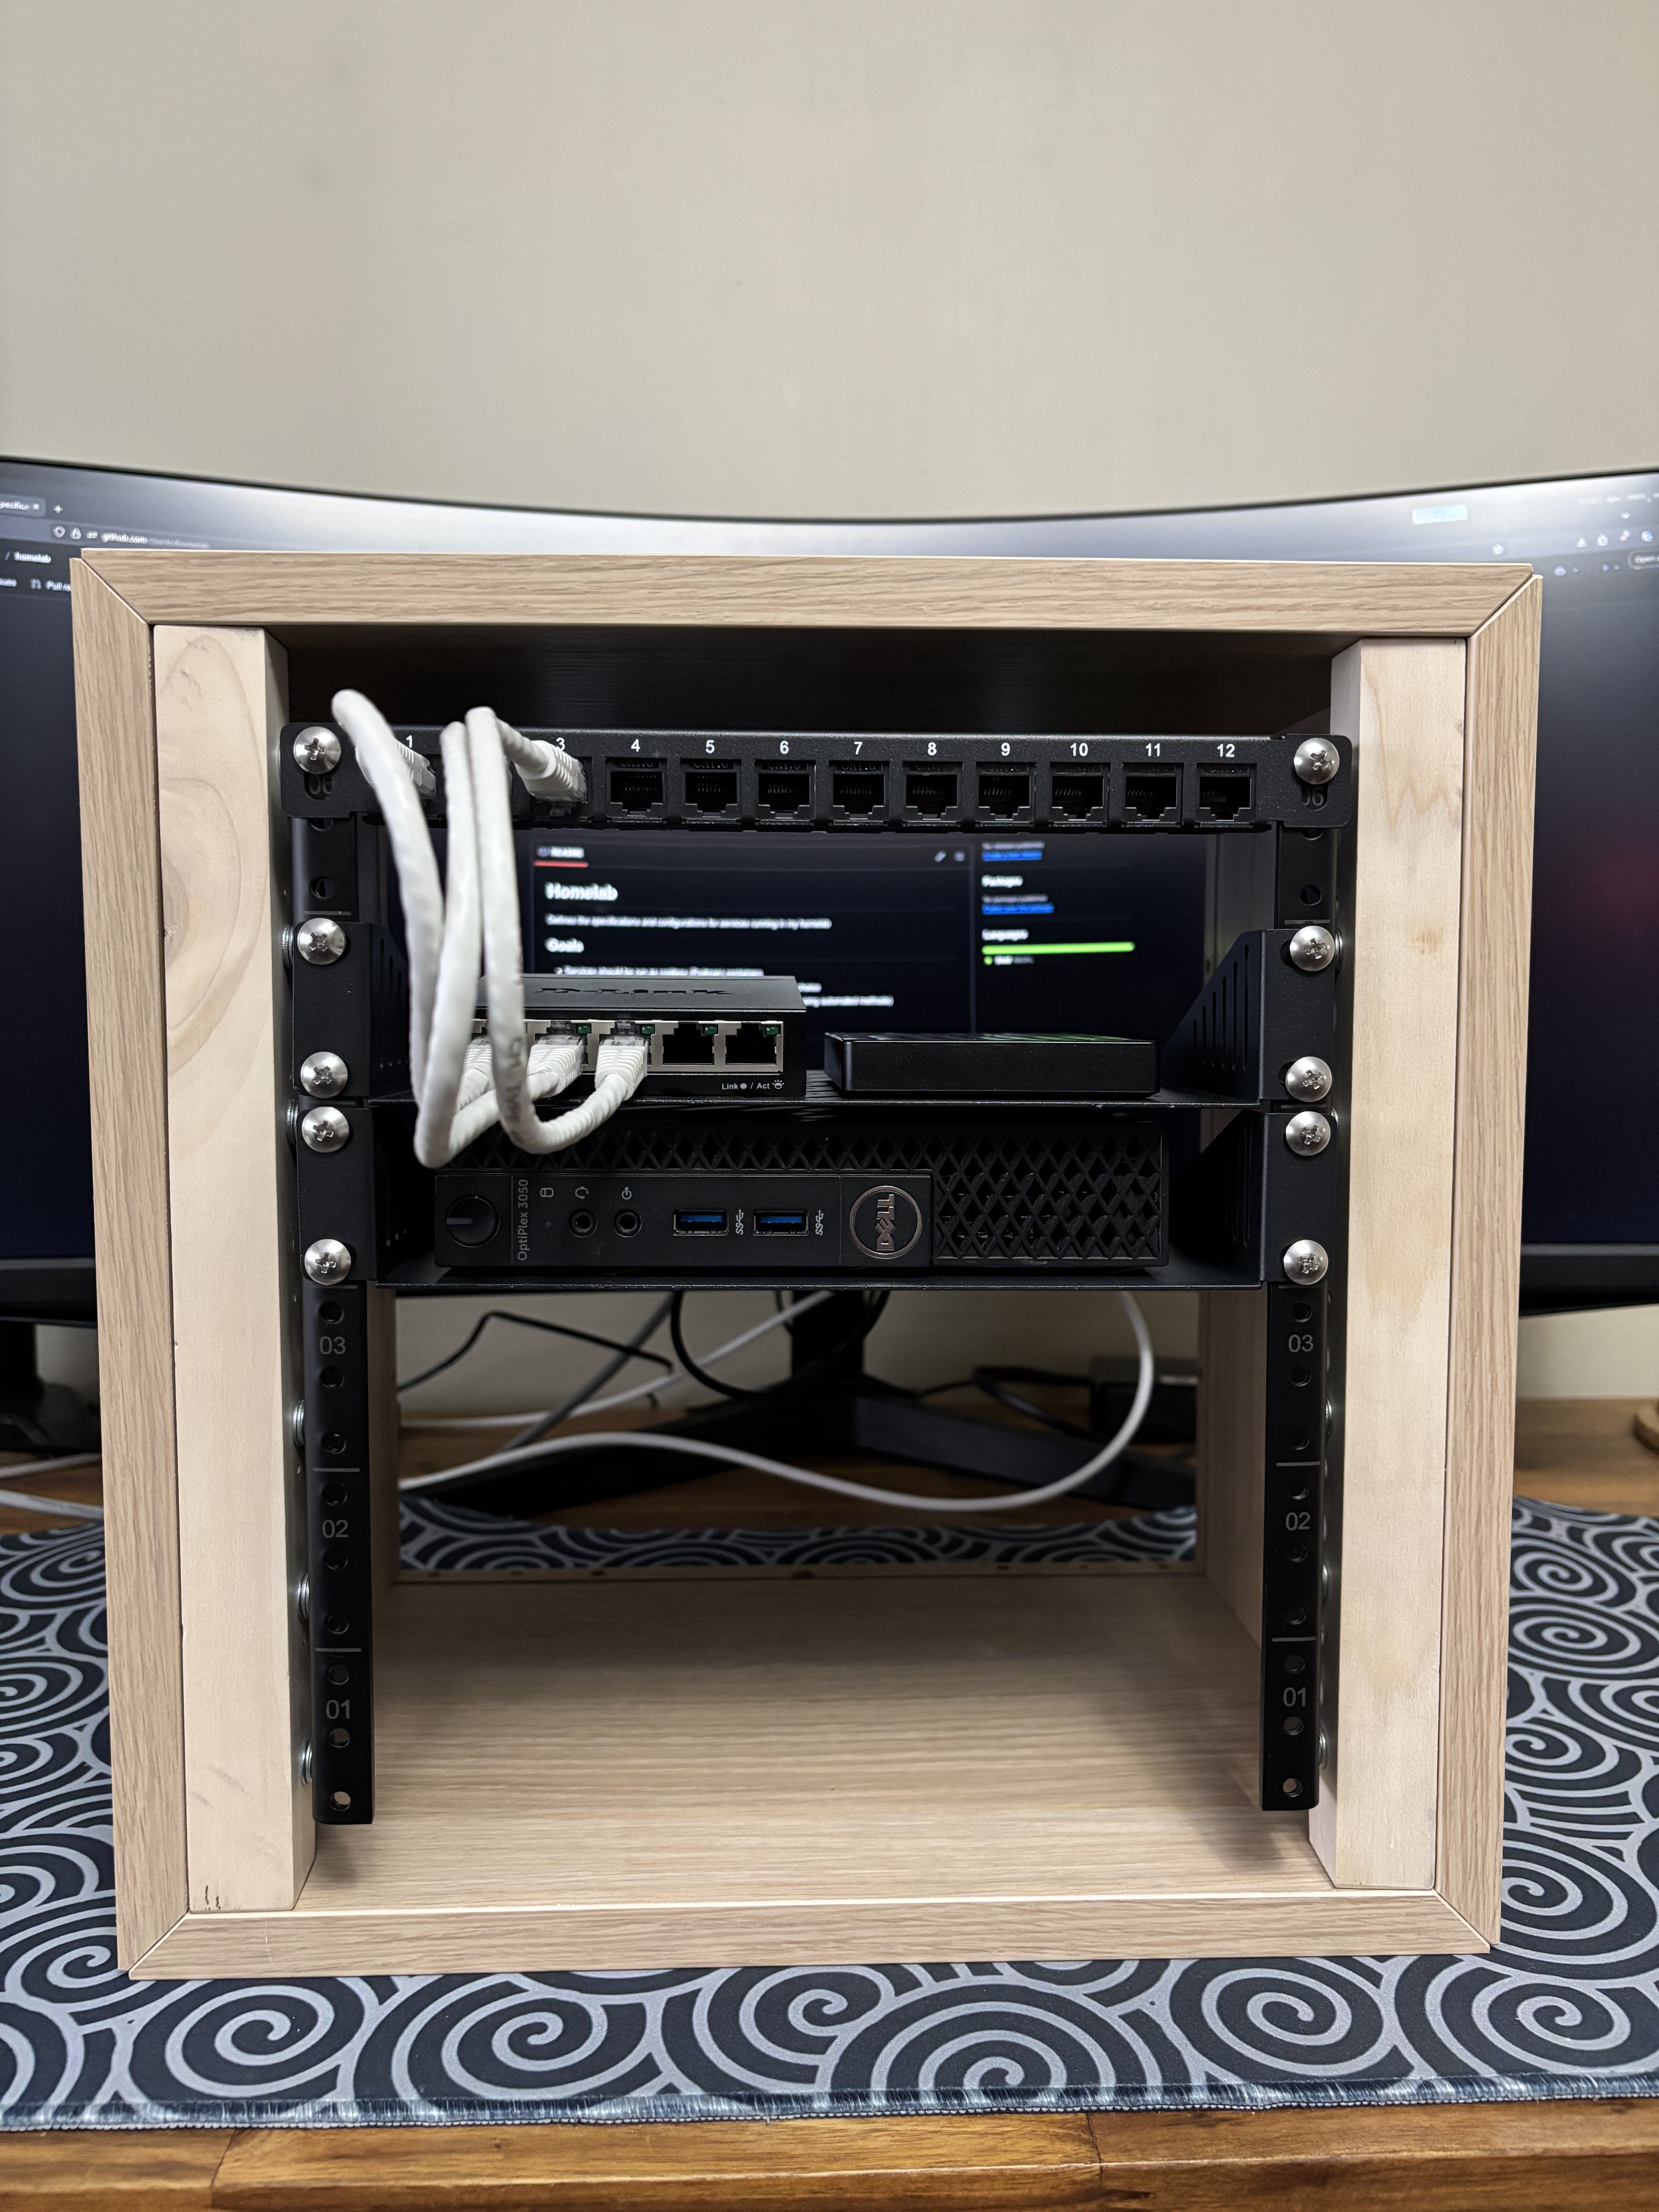
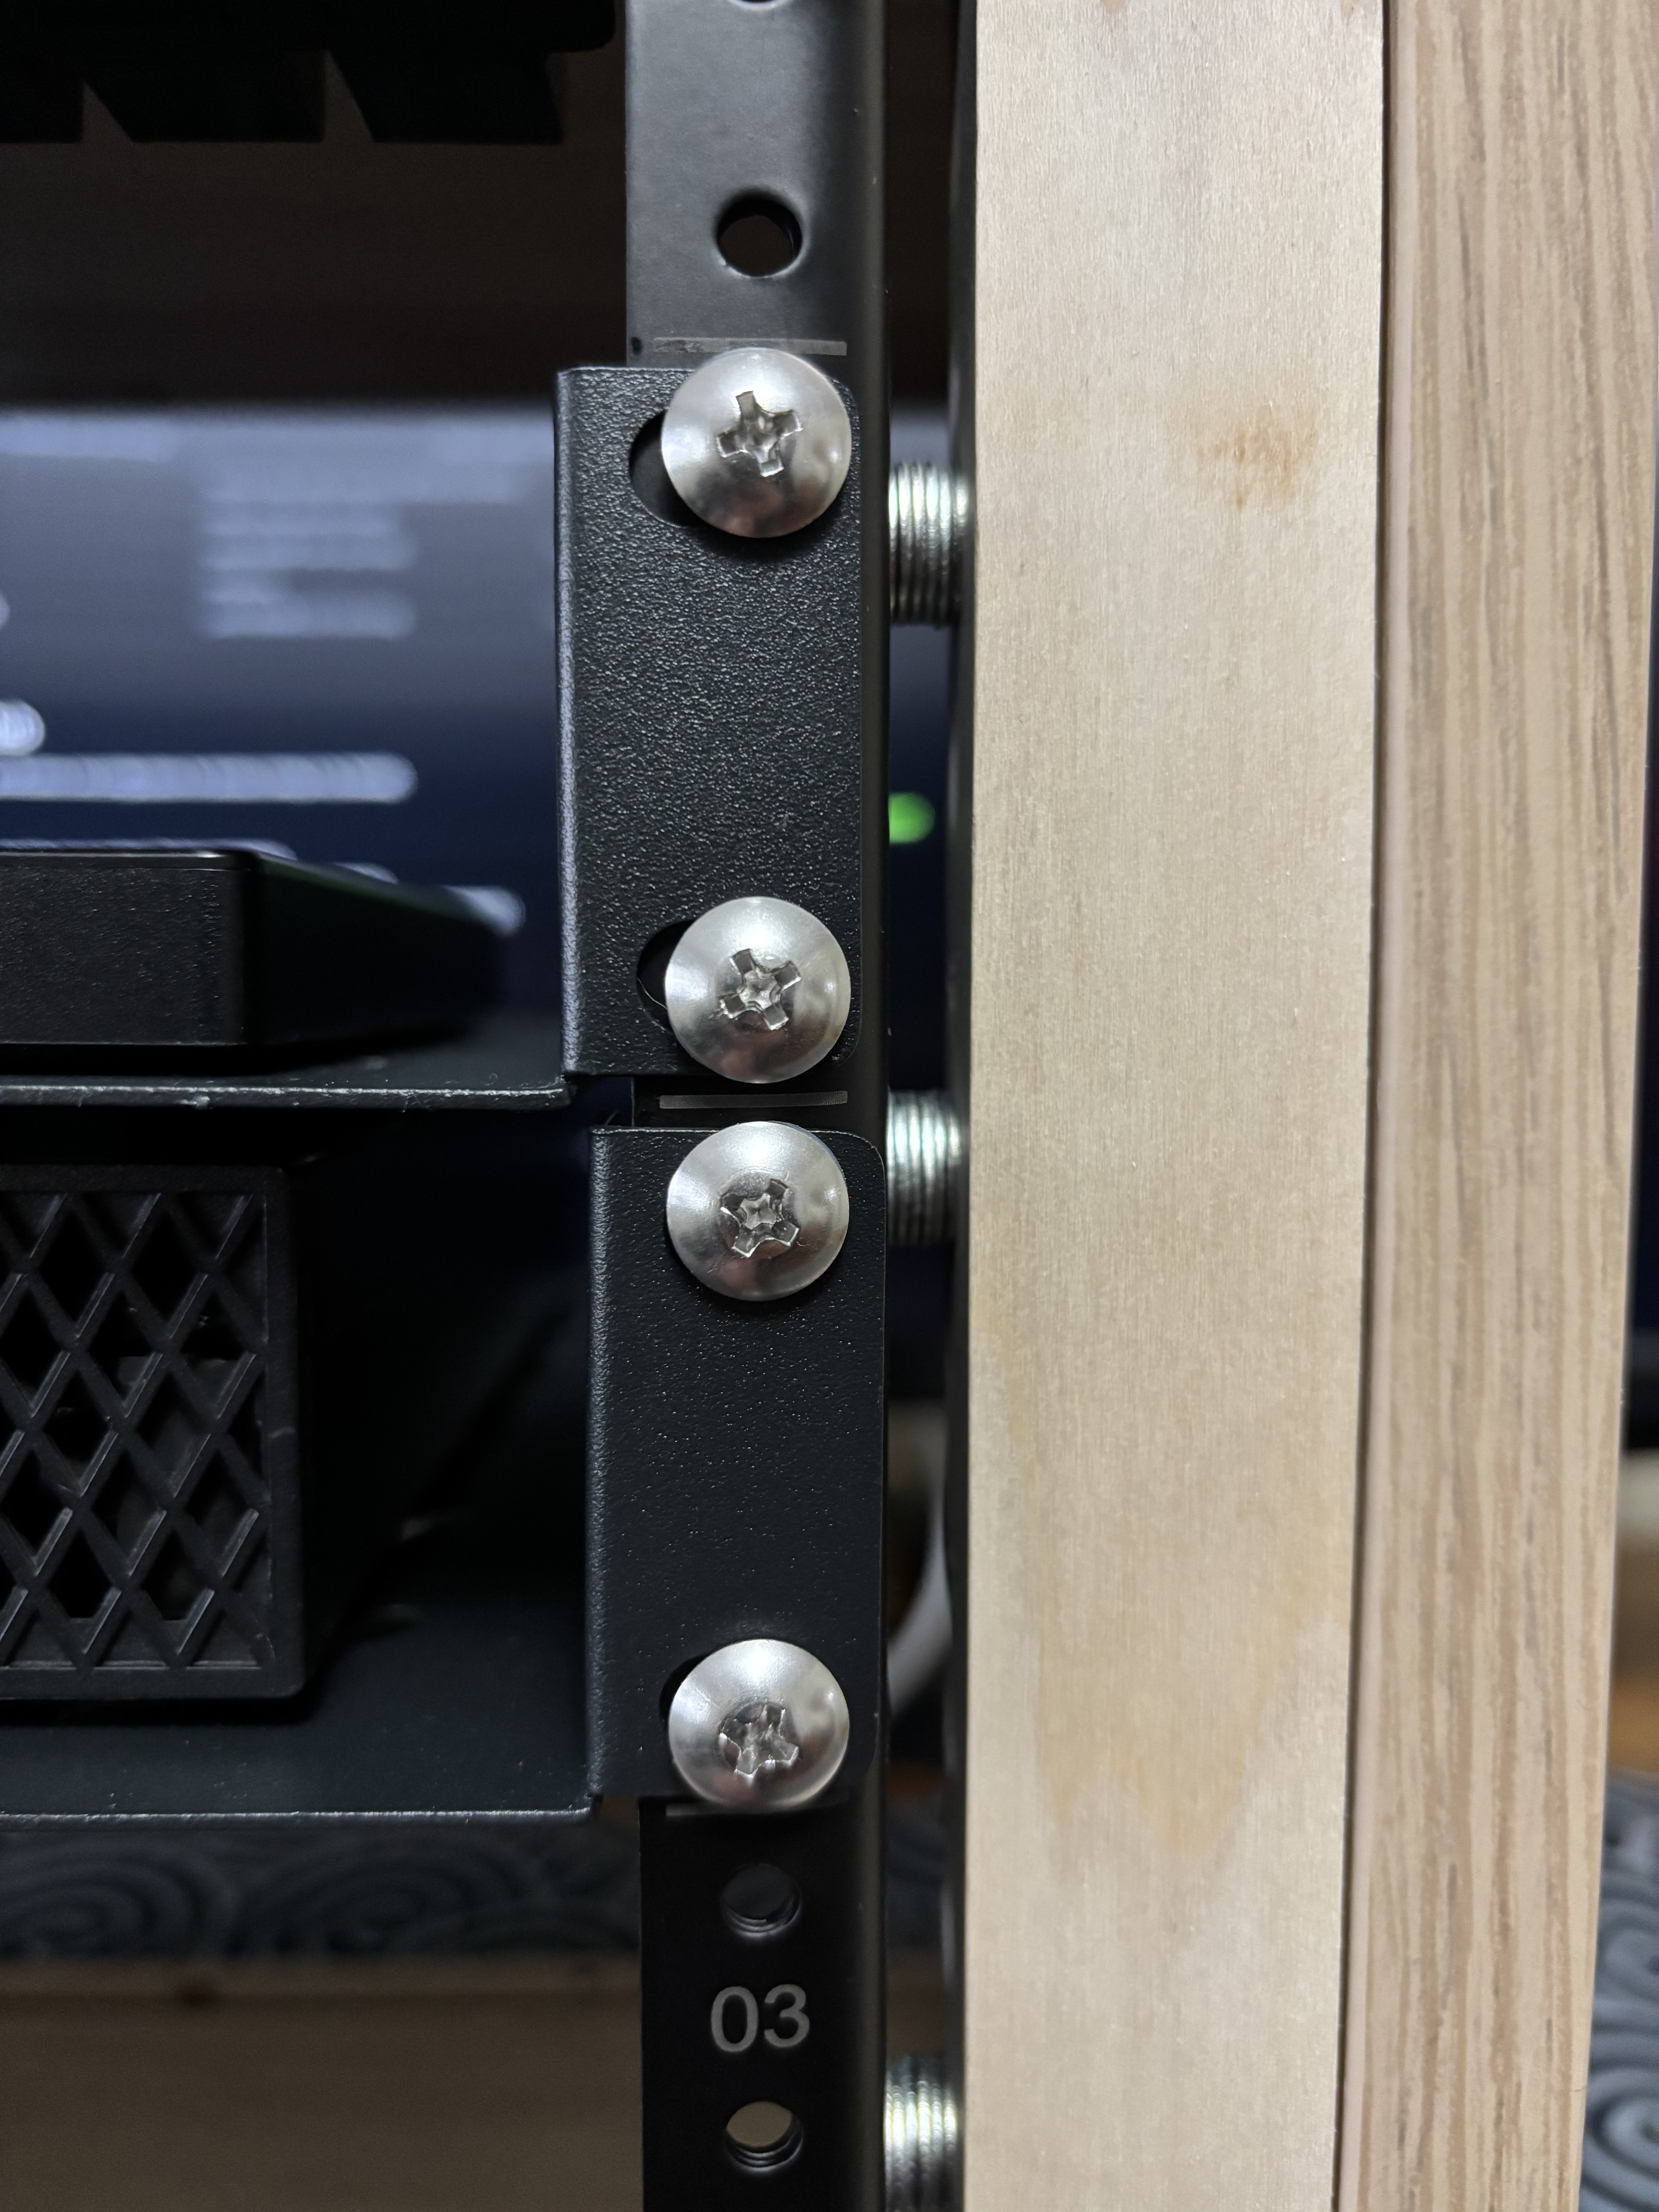
Inspired by a number of previous IKEA EKET rack builds1234, I opted to friction-fit dowels, to which the rack rails and PDU would be attached, into the EKET’s frame. This method avoids drilling into - and subsequently compromising the structural integrity of - the IKEA cabinet’s particleboard construction.
The interior height and width of the EKET frame is advertised as 12.25”; however, I measured 12.5”. Therefore, I cut the dowels to approximately 12.5” and hand-sanded the tops and bottoms of each until they fit snugly into the frame (coerced by a mallet, at least). Aligning the rails to the centre of each dowel, I marked the mounting locations and drilled small pilot holes. As the 10” wide rack shelves must fit into the 12.5” frame supported by two 1” dowels ( 0.5” remaining gap), I balanced 0.25” worth of washers on each hole of each dowel (approximately six washers for each of the six holes for each dowel-rail pair). With the rails carefully placed atop the washers, I hand-threaded wood screws into the pilot holes before drilling with an impact driver. Finally, each dowel could be coerced into the EKET’s frame for good. With the rails in place, the patch panel and shelves could simply be bolted in, and the computing/network resources situated where required or desired.
Result
Note
Cables, etc. omitted for clarity
Summary
In this post, I gave a brief update into the state of the homelab (now minilab), including its simultaneous shrinkage and cleanup.
Footnotes
-
https://www.reddit.com/r/minilab/comments/1kwq0kf/ikea_eket_club_10_tinyrack_build/ ↩
-
https://www.reddit.com/r/homelab/comments/17r76c2/introducing_the_ikea_10_rack/ ↩
-
https://www.reddit.com/r/homelab/comments/1k1q5vq/ikea_eket_network_rack/ ↩
-
https://www.reddit.com/r/homelab/comments/18kgcl7/ive_joined_the_ikea_eket_10_rack_trend/ ↩